12.9.1 Packet Tracer - Implement A Subnetted Ipv6 Addressing Scheme
Onlines
Mar 25, 2025 · 6 min read
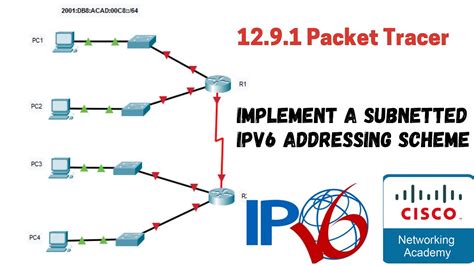
Table of Contents
12.9.1 Packet Tracer: Implementing a Subnetted IPv6 Addressing Scheme
Implementing a subnetted IPv6 addressing scheme might seem daunting at first, but with a structured approach and a solid understanding of the fundamentals, it becomes a manageable task. This comprehensive guide will walk you through the process, using Packet Tracer 12.9.1 as a practical learning environment. We'll cover the key concepts, best practices, and troubleshooting steps to ensure you successfully design and implement your own IPv6 subnetted network.
Understanding IPv6 Addressing and Subnetting
Before diving into the Packet Tracer implementation, let's refresh our understanding of IPv6 addressing and subnetting. IPv6 addresses are significantly longer than their IPv4 counterparts, offering a vastly expanded address space. This is crucial for accommodating the ever-growing number of internet-connected devices.
IPv6 Address Structure:
An IPv6 address consists of 128 bits, typically represented as eight groups of four hexadecimal digits separated by colons. For example: 2001:0db8:85a3:0000:0000:8a2e:0370:7334. Leading zeros within each group can be omitted, and consecutive groups of zeros can be represented by a double colon (::), but only once per address.
IPv6 Subnetting:
Similar to IPv4, IPv6 utilizes subnetting to divide a larger network into smaller, more manageable subnetworks. This improves network organization, security, and efficiency. In IPv6, subnetting is achieved by borrowing bits from the network prefix, which is the portion of the address that identifies the network. The borrowed bits become the subnet ID, allowing for multiple subnetworks within a single network prefix. The remaining bits form the host ID, which uniquely identifies each device within a subnet.
Key Concepts:
-
Network Prefix: The number of bits assigned to the network portion of the address. It determines the size of the network and the number of available subnets. Represented as
/n, where 'n' is the number of bits in the prefix. For example,/64indicates a 64-bit network prefix. -
Subnet Mask: Not explicitly used in IPv6 like in IPv4. The network prefix itself implicitly defines the subnet mask.
-
Subnet ID: The portion of the address derived from the borrowed bits of the network prefix. This uniquely identifies each subnet.
-
Host ID: The remaining bits after the network prefix and subnet ID. It uniquely identifies each device within a subnet.
Implementing a Subnetted IPv6 Network in Packet Tracer 12.9.1
Now let's move on to the practical implementation using Packet Tracer 12.9.1. We'll design a small network with multiple subnets and configure IPv6 addresses accordingly.
Step 1: Network Design
First, design your network topology in Packet Tracer. For this example, let's consider a network with:
- One Router (R1): This will act as the gateway for all subnets.
- Two Subnets: Subnet A and Subnet B, each with multiple devices.
- Devices in each subnet: A mix of PCs and servers.
Step 2: Assigning IPv6 Addresses
Choose an appropriate IPv6 network prefix for your network. A common choice is /64, which provides ample room for subnetting. Let's use 2001:db8:1::/64. Now, subdivide this network into two subnets:
- Subnet A:
2001:db8:1::/64(First 64 bits for the network, next 64 bits for nodes in this subnet) - Subnet B:
2001:db8:2::/64(First 64 bits for the network, next 64 bits for nodes in this subnet)
Assign unique IPv6 addresses to each device within its respective subnet. Remember to leave the first and last addresses in each subnet range unassigned (network address and broadcast address). For example:
-
Subnet A:
- PC1:
2001:db8:1::1/64 - PC2:
2001:db8:1::2/64 - Server1:
2001:db8:1::3/64
- PC1:
-
Subnet B:
- PC3:
2001:db8:2::1/64 - PC4:
2001:db8:2::2/64 - Server2:
2001:db8:2::3/64
- PC3:
Important Note: Packet Tracer might automatically suggest a /64 subnet mask, but remember the subnet mask is implicitly defined by the prefix length in IPv6.
Step 3: Router Configuration
Configure the router (R1) to handle both subnets. This typically involves creating interfaces for each subnet and assigning the corresponding subnet addresses. For each interface, you need to configure the IPv6 address of the network interface on the router to route traffic between the subnets. Remember to configure a default gateway on each PC and server. You’ll need to configure appropriate routing tables on R1 to allow communication between the subnets.
Step 4: Device Configuration
Configure each PC and server within its respective subnet by providing them with their assigned IPv6 addresses, subnet mask (implicitly defined by the prefix), and default gateway (the router interface IP address in the subnet).
Step 5: Verification
After completing the configuration, verify connectivity between devices in different subnets. Use the ping command to test connectivity between devices in Subnet A and Subnet B. If the ping is successful, it confirms that your IPv6 subnetted network is working correctly. If it's unsuccessful, troubleshoot the configuration, starting with the simplest elements.
Best Practices for IPv6 Subnetting
-
Plan Ahead: Before implementing any IPv6 addressing scheme, carefully plan your network topology and anticipate future growth.
-
Use Appropriate Prefix Lengths: Choose prefix lengths that balance the need for subnets with the number of available host addresses per subnet.
-
Document Your Network: Maintain thorough documentation of your IPv6 addressing scheme, including subnet IDs, host IDs, and default gateways.
-
Security Considerations: Implement appropriate security measures, such as firewalls and access control lists, to protect your network.
-
Regular Maintenance: Regularly review and maintain your IPv6 addressing scheme to ensure its efficiency and security.
Troubleshooting Common IPv6 Subnetting Issues
If you encounter connectivity problems, consider the following troubleshooting steps:
-
Verify IP Address Configuration: Double-check that all devices have correctly configured IPv6 addresses, subnet masks, and default gateways.
-
Check Router Configuration: Ensure that the router is properly configured to route traffic between subnets.
-
Ping Tests: Perform ping tests between devices to identify connectivity issues.
-
Examine Router Logs: Review router logs for any errors or warnings that might indicate configuration problems.
Advanced IPv6 Concepts
This section briefly touches upon some more advanced IPv6 concepts:
-
SLAAC (Stateless Address Autoconfiguration): A mechanism that allows devices to automatically obtain their IPv6 addresses without needing a DHCP server. This simplifies network administration and scalability.
-
RA (Router Advertisement): Messages sent by routers to provide network configuration information to devices, including prefix information and other parameters.
-
DHCPv6 (Dynamic Host Configuration Protocol for IPv6): Similar to DHCP in IPv4, but for IPv6. Provides centralized IP address management and other configuration options.
-
IPv6 Multicast: A mechanism that enables communication between multiple devices simultaneously. This is crucial for applications like video conferencing and streaming.
Conclusion
Implementing a subnetted IPv6 addressing scheme is a crucial step in modern network design. By following the steps outlined in this guide and understanding the underlying concepts, you can effectively create a scalable, efficient, and secure IPv6 network. Remember to plan ahead, document your configuration, and regularly maintain your network to ensure its optimal performance. Utilizing Packet Tracer 12.9.1 offers a safe and practical environment to experiment and learn. With practice and a structured approach, you will master the art of IPv6 subnetting and build robust and adaptable networks. The key to success is a thorough understanding of the fundamental concepts and a systematic approach to configuration and troubleshooting.
Latest Posts
Latest Posts
-
The Book Of The City Of Ladies Summary
Mar 26, 2025
-
Quotes From It By Stephen King
Mar 26, 2025
-
A Primary Care Physician Performs A Chest X Ray
Mar 26, 2025
-
Bohr Model Worksheet Answer Key Pdf
Mar 26, 2025
-
Cliff Notes Out Of The Silent Planet
Mar 26, 2025
Related Post
Thank you for visiting our website which covers about 12.9.1 Packet Tracer - Implement A Subnetted Ipv6 Addressing Scheme . We hope the information provided has been useful to you. Feel free to contact us if you have any questions or need further assistance. See you next time and don't miss to bookmark.
