Advanced Hardware Lab 2-3 Use Uefi Setup
Onlines
Mar 14, 2025 · 7 min read
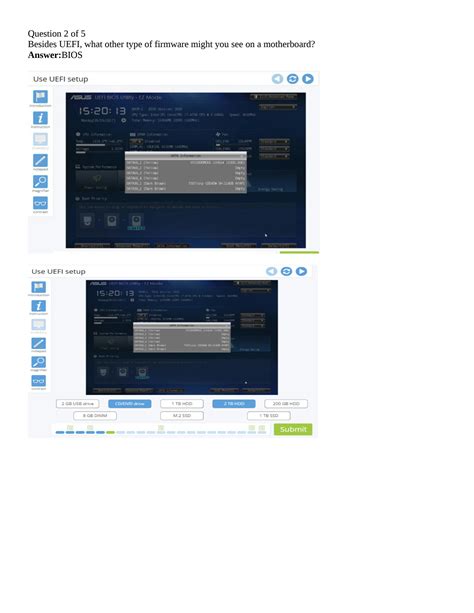
Table of Contents
Advanced Hardware Lab: Mastering UEFI Setup in 2-3 Uses
The Unified Extensible Firmware Interface (UEFI) has largely replaced the older BIOS system in modern computers. Understanding UEFI setup is crucial for advanced hardware labs, allowing for fine-grained control over system boot, hardware configuration, and security settings. This comprehensive guide will delve into advanced UEFI configurations, exploring practical applications within a 2-3 use lab setting. We'll cover everything from basic navigation to advanced features like Secure Boot and managing boot order, emphasizing the practical skills needed for effective hardware troubleshooting and optimization.
Understanding the UEFI Interface: A Foundation for Advanced Labs
Before diving into advanced configurations, it's vital to grasp the fundamental layout and navigation of a typical UEFI interface. While the specific look and feel may vary slightly between manufacturers (e.g., ASUS, Gigabyte, MSI, etc.), the core functionalities remain consistent.
Navigating the UEFI Environment:
- Key Usage: Most UEFI interfaces utilize arrow keys for navigation, Enter to select options, Esc to exit menus, and Delete or F2 (check your motherboard manual) to enter the setup utility itself. Understanding these keys is foundational.
- Main Menu: The main menu usually provides access to various sections such as Boot, Security, Advanced, and Save & Exit. Familiarizing yourself with each section's purpose is crucial.
- Submenus: Each section typically contains several submenus. For instance, the "Boot" section might allow you to adjust the boot order, enable/disable legacy boot support, and configure boot options like CSM (Compatibility Support Module).
Key UEFI Settings for Advanced Labs:
- Boot Order: This critically affects system startup. Changing the boot order allows you to boot from different devices (e.g., USB drives, network drives, optical drives) – essential for installing operating systems, running diagnostic tools, or troubleshooting boot problems. In a lab setting, mastering boot order is fundamental for experimenting with various OS installations.
- Secure Boot: This security feature helps prevent malware from loading during the boot process. While essential for security, disabling it may be necessary for certain lab scenarios (e.g., testing legacy operating systems or specific hardware). Always understand the security implications before disabling Secure Boot.
- CPU Configuration: UEFI often allows for fine-grained control over CPU settings like core ratios, voltages, and power limits. This is particularly valuable in advanced hardware labs where experimenting with overclocking or power management is desired. Caution: Incorrect CPU configuration can lead to system instability or damage. Proceed with extreme caution and consult manufacturer specifications.
- Storage Configuration: This section enables management of storage devices such as hard drives, SSDs, and NVMe drives. It allows for tasks like setting up RAID arrays (Redundant Array of Independent Disks) for data redundancy or configuring AHCI (Advanced Host Controller Interface) or IDE modes.
- Advanced Settings: This section often includes settings that manage various system aspects such as USB legacy support, network boot options, and system time and date. Accessing and understanding these settings is crucial for complex lab work.
Use Case 1: Setting Up a Virtual Machine Environment
In a hardware lab, the ability to create and manage virtual machines (VMs) is paramount. UEFI plays a significant role here:
Using UEFI for VM Installation:
- Boot Order Modification: First, configure the boot order to prioritize the USB drive or ISO image containing your chosen virtualization software (e.g., VMware Workstation Player, VirtualBox). This ensures the VM software loads before the host operating system.
- Secure Boot Considerations: If you're working with older operating systems within the VM, you might need to temporarily disable Secure Boot. This is because legacy operating systems may not be compatible with Secure Boot's security measures. Remember to re-enable Secure Boot afterward.
- Virtual Disk Management: After installing the virtualization software, the UEFI interface won't be directly involved in VM creation. However, proper storage configuration within UEFI ensures that the host system has sufficient space and correctly identifies the storage devices used for VM storage.
- Nested Virtualization: If your lab requires nested virtualization (running VMs within VMs), you’ll likely need to adjust specific settings in both the host's UEFI and the VM's configuration. This involves enabling virtualization features in the host's CPU settings (usually within the Advanced section of UEFI) and possibly adjusting the VM's processor settings.
Use Case 2: Troubleshooting Boot Issues and Hardware Conflicts
UEFI’s capabilities prove invaluable when troubleshooting boot-related problems and resolving hardware conflicts.
Using UEFI for Diagnostics:
- Boot Device Selection: If the system fails to boot, UEFI allows you to manually select a boot device. This helps determine if the boot drive is functioning correctly or if a problem lies elsewhere (e.g., a faulty RAM module).
- Legacy Boot Support: If you encounter boot issues with an older system or operating system, enabling Legacy Boot support (if available) might resolve compatibility problems.
- Hardware Detection: UEFI's ability to list and identify installed hardware can help pinpoint conflicts. If a new device is not recognized, or if the system shows instability after adding a new component, reviewing the UEFI’s hardware detection information is a crucial troubleshooting step.
- Resetting UEFI Settings: In cases of persistent boot failures, resetting the UEFI to its default settings can often resolve problems caused by incorrect configurations. This is a crucial last resort before attempting more complex troubleshooting steps.
Use Case 3: Overclocking and Performance Tuning
Advanced hardware labs often involve overclocking CPU and/or GPU for performance gains. UEFI plays a pivotal role here.
Overclocking with UEFI:
- CPU Configuration: UEFI provides access to CPU settings allowing modification of core ratios, voltages, and multipliers. This control is fundamental for safe and effective overclocking. Overclocking can void warranties and damage hardware if done incorrectly. Proceed with extreme caution and consult manufacturer specifications.
- Monitoring Tools: While UEFI offers base-level control over CPU settings, robust monitoring tools are needed to track crucial parameters like temperature, voltage, and frequencies during overclocking. These tools provide real-time feedback, allowing for careful adjustments to avoid system instability.
- Memory Timing Adjustment: The UEFI’s memory settings (usually found under the Advanced section) enable fine-tuning of RAM timings and voltage. Optimizing these settings can improve system stability and performance, particularly when overclocking.
- Saving Profiles: UEFI often allows saving multiple overclocking profiles. This enables switching between different settings rapidly, streamlining the testing and optimization process.
Advanced UEFI Features and Considerations
Beyond the core functionalities, several advanced UEFI features warrant exploration in an advanced hardware lab:
- UEFI Shell: This command-line interface provides low-level access to system hardware and firmware. It's a powerful tool for experienced users, enabling tasks like disk partitioning, file system manipulation, and network diagnostics.
- GPT and MBR Partitioning: UEFI supports GPT (GUID Partition Table), which offers more flexibility and larger disk support compared to MBR (Master Boot Record). Understanding the differences and implications of each partitioning scheme is essential.
- Network Boot Options: UEFI allows booting from network sources, crucial for scenarios like deploying operating systems remotely or using network-based diagnostic tools. Configuring these settings requires network knowledge and proper network infrastructure.
- TPM (Trusted Platform Module): TPM is a security chip used for encryption and secure boot. Understanding its configuration and its implications for security are increasingly important.
- Virtualization Technology: Enabling features like Intel VT-x or AMD-V in the UEFI is crucial for running VMs efficiently. This allows the CPU to dedicate resources to virtual machines seamlessly, enhancing overall performance.
Conclusion: Mastering UEFI for Enhanced Lab Experiences
Mastering UEFI setup is essential for anyone working in an advanced hardware lab environment. Its capabilities extend beyond basic system configuration, providing fine-grained control over hardware, security, and performance. By understanding the core functionalities and utilizing the advanced features discussed here, you can significantly enhance your lab experiences, enabling complex experiments, efficient troubleshooting, and advanced performance tuning. Always remember to consult your motherboard's manual for specific details and to proceed with caution when experimenting with advanced settings, especially those relating to overclocking or security configurations. The knowledge gained from understanding and implementing these UEFI techniques will significantly improve your ability to navigate and master complex hardware scenarios. Remember to always back up your data before making any significant UEFI changes.
Latest Posts
Latest Posts
-
What Is The Ram Udimm Vs Sodimm
Mar 14, 2025
-
Hardware Lab Simulation 10 1 Install And Configure A Printer
Mar 14, 2025
-
Rime Of The Ancient Mariner Summary
Mar 14, 2025
-
What Must Companies Do To Be Competitive In Todays Market
Mar 14, 2025
-
Software Lab Simulation 20 2 Practicing Macos Commands
Mar 14, 2025
Related Post
Thank you for visiting our website which covers about Advanced Hardware Lab 2-3 Use Uefi Setup . We hope the information provided has been useful to you. Feel free to contact us if you have any questions or need further assistance. See you next time and don't miss to bookmark.
