Hardware Lab Simulation 4-1 Troubleshooting Memory
Onlines
Mar 13, 2025 · 6 min read
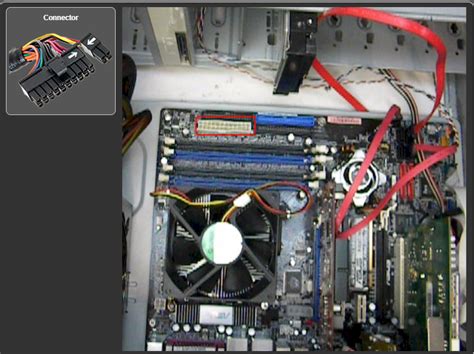
Table of Contents
Hardware Lab Simulation 4-1: Troubleshooting Memory Issues – A Comprehensive Guide
Troubleshooting computer memory issues can be a frustrating but crucial skill for any aspiring IT professional. Hardware lab simulations provide a safe and controlled environment to hone these skills without the risk of damaging expensive equipment. This comprehensive guide will walk you through a typical Hardware Lab Simulation 4-1 scenario focusing on memory troubleshooting, equipping you with the knowledge and techniques to diagnose and resolve common memory problems.
Understanding the Basics of Computer Memory (RAM)
Before diving into troubleshooting, it's essential to understand the fundamentals of Random Access Memory (RAM). RAM is volatile memory; this means that it loses its contents when the power is turned off. It's crucial for the computer's operation, providing temporary storage for the operating system, applications, and data currently in use. Several types of RAM exist (e.g., DDR3, DDR4, DDR5), each with different specifications impacting performance and compatibility.
Key RAM Characteristics to Consider During Troubleshooting:
- Capacity: The total amount of RAM installed in the system (e.g., 8GB, 16GB, 32GB). Insufficient RAM can lead to performance bottlenecks and system instability.
- Type: The specific type of RAM (e.g., DDR4-3200). Incompatible RAM types will prevent the system from booting or functioning correctly.
- Speed: Measured in MHz (megahertz), the speed at which the RAM operates. Faster RAM generally improves performance.
- Modules: The individual sticks of RAM installed in the system. A system might have one, two, four, or more RAM modules.
- Parity/ECC: Error Correction Code (ECC) RAM is designed to detect and correct errors, enhancing reliability. Parity RAM is an older, less effective error-checking method. Standard RAM doesn't include error correction.
Common Memory-Related Problems Simulated in Hardware Lab 4-1
Hardware Lab Simulation 4-1 likely presents scenarios involving several common memory-related problems. These could include:
1. Insufficient RAM:
This is often indicated by slow performance, frequent application crashes, and the operating system struggling to manage resources. The solution might involve upgrading the RAM to a higher capacity.
2. Incompatible RAM:
Using the wrong type of RAM (e.g., installing DDR3 RAM in a system designed for DDR4) can prevent the system from booting or result in system instability and errors. The solution requires installing compatible RAM modules.
3. Faulty RAM Module:
A single defective RAM module can cause various problems, including system crashes, blue screen errors (BSODs), and data corruption. Identifying the faulty module is key to resolving this issue.
4. Incorrect RAM Installation:
Improperly seated RAM modules can lead to intermittent issues or complete system failure. Ensuring proper seating and alignment is crucial.
5. RAM Timing Issues:
Incorrectly configured RAM timings can affect system stability and performance. These settings need to be correctly matched to the RAM modules' specifications and the motherboard's capabilities.
Troubleshooting Steps for Hardware Lab Simulation 4-1
A systematic approach is crucial when troubleshooting memory problems in a simulated hardware lab. Here's a step-by-step guide:
1. Gather Information:
Before physically touching any hardware, collect all available information. This includes:
- Error messages: Note any error messages displayed during boot or system operation. These can provide valuable clues about the problem's nature.
- System symptoms: Document the specific symptoms experienced (e.g., slow performance, frequent crashes, BSODs).
- Hardware specifications: Identify the type and capacity of RAM currently installed, and the motherboard's specifications regarding supported RAM types and speeds.
2. Visual Inspection:
Carefully inspect the RAM modules. Look for any:
- Physical damage: Bent pins, broken components, or visible signs of damage.
- Loose connections: Check if the RAM modules are firmly seated in their slots.
3. Reseating the RAM Modules:
Even if no damage is visible, try reseating the RAM modules. Properly power down the system, open the computer case, gently remove the RAM modules, and reinsert them, ensuring they click firmly into place. This often resolves issues caused by loose connections.
4. Testing with a Single RAM Module:
If your system allows it, test the system with only one RAM module at a time. This helps to isolate whether the problem is with a specific module or a system-wide issue. Start by testing each module individually in the first RAM slot.
5. Utilizing Diagnostic Tools (Simulated):
Most hardware lab simulations will include diagnostic tools. These tools typically allow you to:
- Run memory tests: These tests check the RAM for errors and identify any faulty modules.
- View system information: Access information about installed RAM, its specifications, and other system details.
6. BIOS/UEFI Settings Review (Simulated):
The BIOS (Basic Input/Output System) or UEFI (Unified Extensible Firmware Interface) settings can also affect RAM performance and stability. The simulation should allow you to:
- Check RAM settings: Ensure the RAM speed, timings, and voltage are correctly configured for the installed modules. Incorrect settings can lead to instability.
- Enable/Disable memory features: Some BIOS/UEFI options relate to memory control and error correction. Experimenting within the simulation's bounds might solve specific issues.
7. Documenting the Process:
Throughout the entire troubleshooting process, maintain meticulous documentation. This includes:
- Detailed steps taken: Record every action, including the order of operations and any changes made to the system.
- Results of each step: Note the outcome of each troubleshooting step (e.g., whether an error persists or is resolved).
- Observations: Record any unusual behavior observed during the troubleshooting process.
Advanced Troubleshooting Techniques (Beyond Basic Simulation)
While Hardware Lab Simulation 4-1 likely focuses on basic troubleshooting, more advanced techniques exist that may be relevant in real-world scenarios:
- Memory Testing Software: In real-world situations, using external memory testing software (like MemTest86) is crucial for thoroughly testing RAM modules for errors.
- Checking Motherboard Compatibility: Verify that the motherboard supports the installed RAM modules. Consult the motherboard manual for compatible RAM specifications.
- Adjusting Voltage (Advanced): In some cases, adjusting the RAM voltage (within safe limits) can improve stability. However, this is an advanced technique and should only be attempted if you have a thorough understanding of its implications.
- Upgrading the BIOS/UEFI: An outdated BIOS or UEFI might have compatibility issues with newer RAM. Updating to the latest version can solve some problems.
Preventing Future Memory Problems
Preventing future memory issues involves proactive measures:
- Proper Installation: Always ensure RAM modules are correctly installed and firmly seated.
- Regular Maintenance: Keep your system clean and free from dust, which can cause overheating and damage components, including RAM.
- High-Quality Components: Invest in high-quality RAM from reputable manufacturers.
- Regular Software Updates: Regularly update your operating system and other software to benefit from improved stability and performance.
- Monitoring System Health: Use system monitoring tools to track RAM usage and identify potential problems before they escalate.
Conclusion
Hardware Lab Simulation 4-1 provides a valuable opportunity to practice troubleshooting memory issues in a safe and controlled environment. By systematically applying the steps outlined in this guide, you can develop the skills needed to diagnose and resolve memory problems effectively. Remember that careful observation, methodical troubleshooting, and thorough documentation are essential for success in resolving even the most challenging memory-related issues. Mastering these techniques will greatly improve your ability to maintain and repair computer systems and enhance your overall understanding of computer hardware. Good luck in your hardware lab simulations!
Latest Posts
Latest Posts
-
Ap Lang Unit 8 Progress Check
Mar 13, 2025
-
Based On The Passage The Haida Had Values That
Mar 13, 2025
-
To Understand An Assertion Is To It
Mar 13, 2025
-
Drag The Tiles To The Correct Boxes
Mar 13, 2025
-
Unit 2 Understanding Functions Unit Test A Answer Key
Mar 13, 2025
Related Post
Thank you for visiting our website which covers about Hardware Lab Simulation 4-1 Troubleshooting Memory . We hope the information provided has been useful to you. Feel free to contact us if you have any questions or need further assistance. See you next time and don't miss to bookmark.
