Hardware Lab Simulation 8-2: Cable Tester
Onlines
Mar 18, 2025 · 6 min read
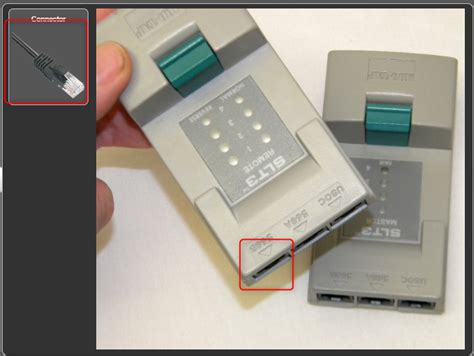
Table of Contents
Hardware Lab Simulation 8-2: Mastering the Cable Tester
The ability to reliably test cables is paramount in any networking or electronics environment. A faulty cable can lead to hours of troubleshooting and lost productivity. Hardware lab simulations, like the hypothetical "Hardware Lab Simulation 8-2: Cable Tester," provide a safe and controlled environment to practice these essential skills without the risk of damaging expensive equipment or disrupting live networks. This comprehensive guide will delve into the intricacies of cable testing, focusing on the theoretical and practical aspects you'd encounter in such a simulation. We'll cover various cable types, testing methods, common faults, and troubleshooting techniques.
Understanding Cable Types and Their Properties
Before diving into the specifics of cable testing, it's crucial to understand the different types of cables and their characteristics. The simulation likely includes a range of cables, each with unique properties:
1. Twisted Pair Cables (UTP and STP)
- Unshielded Twisted Pair (UTP): The most common type, UTP cables consist of pairs of copper wires twisted together to reduce electromagnetic interference (EMI). They're categorized by their category (Cat5e, Cat6, Cat6a, etc.), which determines their bandwidth and performance capabilities. Simulations often focus on identifying the category of UTP cables through testing.
- Shielded Twisted Pair (STP): STP cables offer improved EMI protection compared to UTP by adding a metallic shield around the wire pairs. Identifying the presence and type of shielding is a key element in a cable tester simulation.
2. Coaxial Cables
Coaxial cables have a central conductor surrounded by a dielectric insulator, a conductive shield, and an outer jacket. They are commonly used for high-frequency applications like cable television and some network connections. In a simulation, you might be asked to identify the impedance of a coaxial cable.
3. Fiber Optic Cables
Fiber optic cables transmit data using light signals through glass or plastic fibers. They offer higher bandwidth and longer distances compared to copper cables. Simulations could include identifying the type of fiber (single-mode or multi-mode) and testing for signal attenuation or breaks.
The Cable Tester: Your Essential Tool
The heart of Hardware Lab Simulation 8-2 is the cable tester itself. This device is designed to analyze the physical and electrical properties of cables, identifying faults and verifying proper connections. Virtual simulations often provide a graphical interface mimicking a real-world cable tester, displaying various parameters and results. Let’s explore the key features and functionalities typically represented:
1. Continuity Testing
This function checks for continuous connections between conductors. A simple continuity test reveals breaks or shorts in the cable's wiring. The simulation will likely display a "pass" or "fail" result, along with visual indicators on the virtual cable diagram.
2. Wiremap Testing
Wiremap testing verifies the correct pairing and order of wires within the cable. Incorrect wiring can lead to network connectivity issues. The simulation may show a visual representation of the wire connections, highlighting any mismatches or errors.
3. Length Measurement
Some cable testers can measure the cable's length. This is useful for inventory management and identifying unusually long or short cables that might indicate a problem. The simulated cable tester would display the measured length.
4. Attenuation Testing (for higher-end simulations)
More advanced simulations might include attenuation testing, which measures signal loss over the cable. High attenuation can significantly impact network performance. The virtual tester would display the attenuation level in decibels (dB).
5. Impedance Measurement (for coaxial cables)
For coaxial cables, impedance measurement is critical. The characteristic impedance of the cable must match the impedance of the connected devices to prevent signal reflections. A simulated tester would display the measured impedance in ohms.
Common Cable Faults and Troubleshooting
A significant part of Hardware Lab Simulation 8-2 likely involves identifying and troubleshooting various cable faults. Here are some common problems you might encounter:
1. Open Circuit
An open circuit occurs when a break in the conductor prevents the flow of electrical current. This usually results in a complete loss of connection. The simulation will clearly indicate an open circuit, allowing you to pinpoint the location of the break.
2. Short Circuit
A short circuit occurs when two or more conductors touch unexpectedly, creating an unintended path for current. This can lead to signal interference or complete failure. The simulation should highlight the location of the short circuit.
3. Miswiring
Miswiring happens when the wires within the cable are not connected correctly. This results in incorrect data transmission. The simulation will visually display the miswired connections, allowing you to identify and correct the error.
4. Cable Damage (Cuts, Kinks, and Crushing)
Physical damage to the cable, such as cuts, kinks, or crushing, can cause interruptions or signal degradation. The simulation may show visual cues representing these damages on the cable diagram.
5. Faulty Connectors
Damaged or poorly crimped connectors can also lead to connectivity problems. The simulation may represent this visually, highlighting the faulty connector.
Interpreting Results and Reporting
In a realistic hardware lab simulation, you'll need to accurately interpret the results displayed by the virtual cable tester. This involves understanding the codes, symbols, and readings provided. Often, a simulation will require you to generate a report summarizing your findings. This report should include:
- Cable type: Specify the type of cable tested (e.g., Cat5e UTP, RG-59 Coaxial).
- Testing methods: List the tests performed (continuity, wiremap, length measurement, etc.).
- Results: Document the results of each test, including any errors or anomalies detected.
- Troubleshooting steps: Detail the steps taken to identify and resolve any identified faults.
- Conclusion: Summarize the overall condition of the cable and its suitability for use.
Advanced Concepts (Potentially Included in a More Complex Simulation)
A more advanced Hardware Lab Simulation 8-2 might include more sophisticated scenarios and tests:
- Testing different cable lengths: Analyzing how cable length affects signal quality and attenuation.
- Testing with different connectors: Understanding the impact of different connector types on cable performance.
- Troubleshooting complex network issues: Using the cable tester as part of a larger troubleshooting process involving other network equipment.
- Identifying specific types of cable faults: Differentiating between various types of shorts, opens, and miswirings.
- Working with different cable tester models: Simulating the use of different cable testers with varying functionalities and interfaces.
Preparing for Hardware Lab Simulation 8-2
To excel in Hardware Lab Simulation 8-2, thorough preparation is essential:
- Review the simulation instructions carefully: Understand the objectives and specific requirements.
- Familiarize yourself with the cable tester interface: Practice navigating the virtual tester’s features.
- Study various cable types and their properties: Develop a deep understanding of different cable standards and specifications.
- Practice identifying common cable faults: Develop your troubleshooting skills by working through example scenarios.
- Understand the importance of accurate reporting: Practice generating clear and concise reports that effectively communicate your findings.
By mastering the concepts and techniques outlined above, you'll be well-prepared to conquer Hardware Lab Simulation 8-2 and gain valuable hands-on experience in cable testing. Remember, proficiency in cable testing is a foundational skill for anyone working in networking or electronics. This simulation provides a crucial stepping stone towards becoming a skilled and confident technician.
Latest Posts
Latest Posts
-
Complete This Statement Food Service Gloves
Mar 18, 2025
-
Dont Panic The Truth About Population Documentary Worksheet
Mar 18, 2025
-
Assign Each Example To The Universal Muscle Characteristic Being Described
Mar 18, 2025
-
Nurses Touch The Leader Case 1 Managing The Team
Mar 18, 2025
-
Dna Fingerprint Analysis Gizmo Answer Key
Mar 18, 2025
Related Post
Thank you for visiting our website which covers about Hardware Lab Simulation 8-2: Cable Tester . We hope the information provided has been useful to you. Feel free to contact us if you have any questions or need further assistance. See you next time and don't miss to bookmark.
