Remove Motherboard Power Supply And Drives
Onlines
Mar 22, 2025 · 5 min read
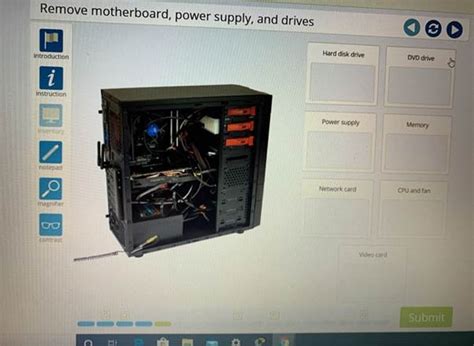
Table of Contents
Removing Motherboard, Power Supply, and Drives: A Comprehensive Guide
This guide provides a comprehensive walkthrough on safely removing a motherboard, power supply, and drives from a computer case. Whether you're upgrading components, troubleshooting issues, or simply cleaning your system, this step-by-step process ensures a smooth and damage-free experience. Remember to always ground yourself before working on internal computer components to prevent electrostatic discharge (ESD) damage. Using an anti-static wrist strap is highly recommended.
Preparing for the Disassembly
Before you begin, you'll need a few things:
- A Phillips head screwdriver: Most computer cases use Phillips head screws.
- Anti-static wrist strap (highly recommended): This will protect your components from ESD.
- A well-lit workspace: Good lighting is crucial for seeing small screws and connectors.
- Optional: A magnetic parts tray: Keeps track of screws and other small parts.
- A camera (optional): Taking pictures as you disassemble can help you remember how things go back together.
Safety First!
Always power down your computer completely before beginning any internal work. Unplug the power cord from the wall outlet, and not just from the back of the computer. This prevents accidental power surges.
Step-by-Step Guide: Removing Peripherals
Before tackling the motherboard, power supply, and drives, it's important to remove any connected peripherals. This makes the process significantly easier and prevents accidental damage.
1. Removing External Devices
- Disconnect all external cables: This includes USB devices, printers, scanners, external hard drives, and any other peripherals connected to the back of your computer.
- Unplug all power cables: This ensures nothing is accidentally powered on during the process.
2. Removing Internal Devices (Optional but Recommended)
This step isn't strictly necessary to remove the motherboard, power supply, and drives, but it makes the process significantly easier and reduces the risk of damage.
- Optical Drives (CD/DVD/Blu-ray): Locate the latch or button on the front of the drive bay that releases the drive. Gently slide the drive out of its bay. Note: There are typically screws securing the drive to the case at the back; remove these before sliding the drive out.
- Internal Hard Drives (HDDs) and Solid State Drives (SSDs): These are typically secured in bays using screws. Locate and remove these screws. Some drives might require you to carefully slide them out from their bays. Remember to note the SATA data and power cable connections before disconnecting them.
- Expansion Cards (Graphics Cards, Sound Cards etc.): These cards usually have a retaining clip at the rear of the case. Press the clip to release the card, then gently pull the card straight out of its slot. Again, note any cable connections before disconnecting them.
Step-by-Step Guide: Removing Motherboard, Power Supply, and Drives
Now that the peripherals are removed, we can move on to the core components.
1. Removing the Side Panel
Most computer cases have a side panel that can be removed to access the internal components. This panel is usually secured by screws at the rear and sometimes on the side. Locate and remove these screws. Gently slide the side panel off the case.
2. Removing the Power Supply
The power supply is usually located at the bottom or top of the case.
- Disconnect the power cables: Carefully disconnect all power cables connected to the motherboard, drives, and any other components. Make a note of which cable goes where for reassembly.
- Remove the power supply screws: The power supply is usually secured with several screws. Remove these screws.
- Remove the power supply: Gently pull the power supply out of the case.
3. Removing Internal Hard Drives and Solid State Drives (if not done previously)
Now that the power supply is removed, it's easier to access the drives.
- Disconnect SATA data and power cables: Carefully disconnect the SATA data and power cables from each drive.
- Remove drive mounting screws: Unscrew the drives from their bays.
- Remove the drives: Carefully take out the drives from their bays.
4. Removing the Motherboard
This is the most delicate part of the process.
- Disconnect all cables: Carefully disconnect all cables connected to the motherboard. This includes power cables, SATA data cables, USB cables, front panel connectors, etc. Take pictures or make detailed notes to remember the connection points.
- Remove motherboard standoffs: Most motherboards are mounted using standoffs (small screws that raise the motherboard above the case). Locate and remove these screws. Be gentle; they are often fragile.
- Remove the motherboard: Carefully lift the motherboard from the case. Support it from its edges to avoid bending the PCB.
Reassembly: A Reverse Process
Reassembling your computer is simply the reverse of the disassembly process. Follow these steps in reverse order:
- Install the motherboard: Carefully place the motherboard back into the case, ensuring it aligns with the standoffs.
- Connect motherboard cables: Reconnect all cables to the motherboard, referring to your notes or pictures.
- Install drives: Mount the hard drives and SSDs back into their bays and connect their data and power cables.
- Install the power supply: Secure the power supply back into place using screws.
- Connect power supply cables: Connect all the necessary power cables.
- Replace the side panel: Slide the side panel back onto the case and secure it with screws.
- Reconnect external peripherals: Connect all external devices and cables.
Troubleshooting Common Issues
- Screws missing or difficult to reach: Use a magnetic parts tray to keep track of screws, and consider using tweezers for hard-to-reach screws.
- Difficult to disconnect cables: If a cable is difficult to disconnect, try gently wiggling it while pulling. Avoid excessive force.
- Static electricity: Always use an anti-static wrist strap to protect your components.
- Motherboard bent: Handle the motherboard carefully, supporting its edges to avoid bending the PCB.
Conclusion
Removing a motherboard, power supply, and drives requires care and attention to detail. By following these steps and taking your time, you can safely and successfully remove and reassemble these crucial components. Remember that safety and preventing damage are paramount. If you're unsure about any step, it's always best to seek assistance from someone experienced. This comprehensive guide aims to empower you with the knowledge and confidence to perform this task successfully. Remember to always power down your system before beginning any maintenance.
Latest Posts
Latest Posts
-
Unit 6 Test Study Guide Similar Triangles Answer Key
Mar 22, 2025
-
The Study Of Learning Derives From Essentially Two Sources
Mar 22, 2025
-
Flat Lying Sedimentary Rocks Are Common In Continental Interiors Because
Mar 22, 2025
-
Wanna Toss The Ol Virtual Pigskin
Mar 22, 2025
-
Which Of The Following Makes For An Engaging Education Experience
Mar 22, 2025
Related Post
Thank you for visiting our website which covers about Remove Motherboard Power Supply And Drives . We hope the information provided has been useful to you. Feel free to contact us if you have any questions or need further assistance. See you next time and don't miss to bookmark.
