Using Cell References Enter A Formula In Cell B6
Onlines
Mar 10, 2025 · 6 min read
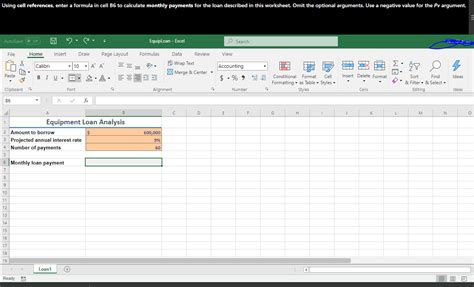
Table of Contents
Using Cell References to Enter Formulas in Cell B6: A Comprehensive Guide
Entering formulas in spreadsheet software like Microsoft Excel or Google Sheets is fundamental to data analysis and manipulation. One of the most crucial aspects of formula creation involves using cell references, which allow your formulas to dynamically update based on the values in other cells. This guide will walk you through the intricacies of using cell references to enter a formula in cell B6, covering various scenarios and providing practical examples.
Understanding Cell References
Before diving into specific formulas, let's establish a firm grasp of cell references. A cell reference is a way to identify a specific cell or a range of cells within a spreadsheet. It's typically composed of a column letter followed by a row number. For instance:
- A1: Refers to the cell in column A and row 1.
- B6: Refers to the cell in column B and row 6 (our target cell).
- C1:C10: Refers to the range of cells from C1 to C10.
Understanding the different types of cell references is crucial for writing efficient and flexible formulas:
1. Relative Cell References
These are the default type of cell references. They adjust relative to the position of the formula. If you copy a formula containing relative references to a new location, the references in the formula will change to reflect its new position. For example, if you have =A1+B1 in cell C1 and copy it down to cell C2, it will become =A2+B2.
2. Absolute Cell References
These references remain constant regardless of where the formula is copied. They are created by adding a dollar sign ($) before either the column letter, the row number, or both.
- $A$1: Absolute reference to cell A1 (column and row are fixed).
- $A1: Absolute reference to column A (row is relative).
- A$1: Absolute reference to row 1 (column is relative).
3. Mixed Cell References
These combine aspects of both relative and absolute references. You can have a fixed column and a relative row, or vice versa.
- $A1: The column (A) is absolute, the row (1) is relative.
- A$1: The row (1) is absolute, the column (A) is relative.
Basic Formulas in Cell B6
Let's start with some fundamental formulas using cell references in cell B6. We'll assume that cells A1 through A5 contain numerical values.
1. Summation
To calculate the sum of the values in cells A1 through A5, you would enter the following formula in cell B6:
=SUM(A1:A5)
The SUM function adds all the numbers within the specified range. This is a concise and efficient way to perform summation.
2. Average
To compute the average of the values in cells A1 through A5, use the AVERAGE function:
=AVERAGE(A1:A5)
This formula will calculate the arithmetic mean of the numbers in the specified range.
3. Maximum and Minimum Values
To find the largest and smallest values in the range A1:A5, you'd use the MAX and MIN functions, respectively:
=MAX(A1:A5) (finds the maximum value)
=MIN(A1:A5) (finds the minimum value)
4. Basic Arithmetic Operations
You can perform basic arithmetic operations directly using cell references. For example, to add the value in A1 to the value in A2 and then subtract the value in A3, you could use:
=A1+A2-A3
Similarly, you can use multiplication (*), division (/), and exponentiation (^).
Advanced Formulas and Cell References in B6
Now let's explore more sophisticated formula examples, showcasing the power and flexibility of cell referencing.
1. Conditional Statements with IF
The IF function allows you to perform different calculations based on a condition. Let's say you want to display "Pass" in B6 if the average of A1:A5 is greater than or equal to 70, and "Fail" otherwise:
=IF(AVERAGE(A1:A5)>=70,"Pass","Fail")
This formula checks the condition and returns the appropriate text string.
2. VLOOKUP and HLOOKUP
These functions are powerful tools for looking up values in tables. VLOOKUP searches vertically, while HLOOKUP searches horizontally. Let's assume you have a table in cells D1:E5, where column D contains names and column E contains corresponding scores. To find the score for a name in cell A6 using VLOOKUP, you would enter:
=VLOOKUP(A6,D1:E5,2,FALSE)
A6is the value to search for (the name).D1:E5is the table array.2indicates that the result should be taken from the second column of the table.FALSEensures an exact match.
3. Nested Formulas
You can combine multiple functions within a single formula, creating nested formulas. For example, to calculate a bonus based on a score (in A1), where a bonus is 10% of the score if it's above 80, and 5% otherwise:
=IF(A1>80,A1*0.1,A1*0.05)
This formula nests the IF function within a multiplication operation.
4. Using Absolute and Mixed References
Let's say you want to calculate a percentage increase compared to a fixed value in cell A1. To do so, you can use an absolute reference for A1 and a relative reference for another cell, for instance A2:
= (A2 - $A$1) / $A$1
Copying this formula down would calculate the percentage increase relative to the fixed value in A1, ensuring consistent reference to the baseline value.
5. Array Formulas
Array formulas allow you to perform calculations on multiple cells simultaneously. Suppose you want to sum the squares of values in A1:A5. In Excel, you would enter:
{=SUM(A1:A5^2)}
(Note: You enter this formula by pressing Ctrl+Shift+Enter, which adds the curly braces.) Google Sheets handles array formulas slightly differently, without requiring Ctrl+Shift+Enter.
Error Handling in Formulas
Spreadsheet software provides several functions to handle errors gracefully and prevent your formulas from breaking. The most commonly used are:
IFERROR: Returns a specified value if an error occurs, otherwise returns the result of the formula. For example:=IFERROR(A1/B1,0)returns 0 if B1 is zero.ISERROR: Checks if a cell contains an error.
Practical Applications and Examples
Let's explore practical scenarios where using cell references in B6 would be beneficial:
- Financial Modeling: Calculate net profit, profit margin, or return on investment based on values in other cells.
- Data Analysis: Compute statistical measures like standard deviation, variance, or correlation coefficients.
- Inventory Management: Track inventory levels, calculate reorder points, or analyze sales data.
- Project Management: Calculate project timelines, track progress, or analyze task durations.
- Sales Reporting: Analyze sales figures, compute commission, or identify top-performing products.
By understanding the various types of cell references and utilizing appropriate functions, you can build sophisticated and efficient spreadsheets to analyze your data effectively. Remember to always double-check your formulas and test them with sample data to ensure accuracy. The correct use of cell referencing is key to creating dynamic and reusable spreadsheets that adapt to changing data effortlessly. This comprehensive guide provides a strong foundation for mastering cell references and building complex, yet efficient, formulas in your spreadsheet applications. Continue exploring the wide array of functions available to expand your data manipulation capabilities even further.
Latest Posts
Latest Posts
-
Cell Transport Graphic Organizer Answer Key Pdf
Mar 10, 2025
-
Vista Higher Learning Spanish Answer Key
Mar 10, 2025
-
Signing Naturally Unit 4 Answer Key Pdf
Mar 10, 2025
-
The Sociological Imagination Chapter 1 Summary
Mar 10, 2025
-
Apush Unit 3 Progress Check Mcq
Mar 10, 2025
Related Post
Thank you for visiting our website which covers about Using Cell References Enter A Formula In Cell B6 . We hope the information provided has been useful to you. Feel free to contact us if you have any questions or need further assistance. See you next time and don't miss to bookmark.
