3.3.6 Connect Patch Panel Cables 1
Onlines
Mar 21, 2025 · 6 min read
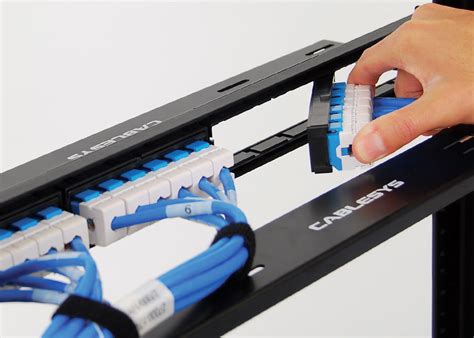
Table of Contents
Understanding and Implementing 3.3.6 Connect Patch Panel Cables: A Comprehensive Guide
Patch panels are the unsung heroes of structured cabling systems. They provide the crucial link between your network equipment and your cabling infrastructure, enabling flexible connectivity and streamlined management. Within this system, the cable connecting to the patch panel plays a vital role. This in-depth guide focuses on 3.3.6 connect patch panel cables, exploring their specifications, applications, installation, and troubleshooting. We’ll delve deep into the nuances of this cabling standard to empower you with the knowledge to make informed decisions and build a robust, reliable network.
What are 3.3.6 Connect Patch Panel Cables?
The designation "3.3.6 connect" doesn't directly refer to a specific cable type or standard like Cat5e or Cat6. Instead, it's a more general description likely referring to cabling within a specific structured cabling system installation adhering to industry best practices. The “3” might denote a specific floor or building in a larger infrastructure, “3.6” might indicate a particular rack or cabinet location, and “connect” signifies its function of connecting network devices to the patch panel. This systematization helps in identifying and managing cables within a complex network environment. Therefore, the cables themselves could be various types, including Cat5e, Cat6, Cat6a, or fiber optic cables, depending on the network's bandwidth and performance requirements. It's crucial to understand the underlying cable type to accurately assess its capabilities.
Choosing the Right Cable Type for Your 3.3.6 Patch Panel
The selection of the appropriate cable type is paramount to ensure optimal network performance. Factors to consider include:
-
Bandwidth Requirements: Higher bandwidth applications, such as 10 Gigabit Ethernet or higher, necessitate cables with superior performance characteristics like Cat6a or fiber optic cables. Lower bandwidth applications might suffice with Cat5e or Cat6 cables.
-
Cable Length: Longer cable runs will experience increased signal attenuation. Choosing the right cable type to mitigate signal loss is essential. For longer runs, consider fiber optic cables or Cat6a cables.
-
Budget: Fiber optic cables and higher-category cables are generally more expensive than lower-category cables. Balancing performance requirements with budget constraints is crucial.
-
Future Scalability: Investing in higher-category cables can provide future-proofing for increased bandwidth demands. Although initially more expensive, they offer a longer-term cost advantage.
Understanding Cable Categories:
-
Cat5e: Supports Gigabit Ethernet speeds (1 Gbps) and is suitable for many standard network applications.
-
Cat6: Supports up to 10 Gigabit Ethernet speeds (10 Gbps) over shorter distances. It offers better performance and is more resilient to interference than Cat5e.
-
Cat6a: Supports 10 Gigabit Ethernet speeds (10 Gbps) over longer distances and is highly recommended for high-speed networks.
-
Fiber Optic Cables: Offer superior performance over very long distances and high bandwidth applications, immune to electromagnetic interference. They are essential for high-capacity networks and data centers.
Proper Installation of 3.3.6 Connect Patch Panel Cables
Proper installation is crucial for optimal network performance and longevity. Follow these steps for a successful installation:
-
Planning and Design: Carefully plan the cable routing to minimize bends, kinks, and unnecessary lengths. Clearly label each cable at both ends for easy identification.
-
Cable Termination: Crimping the cable ends properly is critical. Use high-quality RJ45 connectors and ensure a secure and consistent crimp. Use a crimping tool specifically designed for the cable type. A poorly crimped connection can lead to signal degradation and network issues.
-
Patch Panel Organization: Organize the cables neatly within the patch panel using cable management tools such as cable ties and labels. This ensures easy identification, maintenance, and troubleshooting. Proper labeling is crucial for the long-term management of your network infrastructure. Use a consistent and clear labeling system.
-
Testing: Always test your cable connections after installation using a cable tester to confirm the integrity of each connection. This step identifies any potential problems early on, avoiding costly downtime. The cable tester should identify any shorts, opens, or miswires.
-
Documentation: Maintain detailed documentation of the cable layout and connections. This documentation will prove invaluable during troubleshooting and future maintenance. Include details such as cable type, length, and connectivity points.
Troubleshooting Common Issues with 3.3.6 Connect Patch Panel Cables
Even with careful planning and installation, problems can arise. Here are some common issues and how to resolve them:
-
Intermittent Connectivity: This often indicates a loose connection, damaged cable, or faulty connector. Check all connections carefully, replace any damaged components, and retest.
-
No Connectivity: This could be due to a completely severed cable, a faulty RJ45 connector, or an incorrect wiring scheme. Inspect the cables visually for any damage and verify proper termination using a cable tester.
-
Slow Network Speeds: This could be due to a variety of factors, including cable quality, distance, interference, or network congestion. Check for interference sources, ensure proper termination, and consider upgrading to a higher-category cable if necessary.
-
Signal Attenuation: This is a gradual weakening of the signal over distance. Ensure the cables meet the length requirements of the selected cable type and consider using cable amplifiers or repeaters for longer distances.
-
Electromagnetic Interference (EMI): EMI can interfere with signal transmission. Shield your cables where possible to reduce this interference. Proper cable routing, away from power lines and other sources of EMI, is also crucial.
Best Practices for Maintaining Your 3.3.6 Connect Patch Panel Cables
Regular maintenance is key to ensuring the long-term reliability of your network infrastructure. These steps will help extend the life of your cables and maintain optimal network performance:
-
Regular Inspection: Periodically inspect the cables and connections for any signs of damage, wear, or loose connections. Pay attention to areas subject to stress or movement.
-
Cleanliness: Keep the patch panel and surrounding area clean and free of dust and debris. Dust can accumulate and interfere with signal transmission.
-
Stress Relief: Use cable ties and other management tools to prevent stress on the cables, minimizing the risk of damage.
-
Environmental Protection: Protect cables from extreme temperatures, humidity, and other environmental factors that could degrade cable performance.
-
Documentation Updates: Keep your cable documentation up to date to reflect any changes or additions made to the network infrastructure.
Advanced Considerations for 3.3.6 Connect Patch Panel Cables
For larger and more complex networks, additional factors must be considered:
-
Cable Management Systems: Invest in a robust cable management system to keep cables organized and prevent tangles.
-
Redundancy: Consider implementing redundant cabling to ensure network uptime in case of cable failure.
-
Fiber Optics: For high-bandwidth, long-distance applications, fiber optic cables offer superior performance and reliability compared to copper cables.
-
Network Monitoring Tools: Utilize network monitoring tools to track network performance and identify potential issues before they lead to downtime.
-
Professional Installation: For complex network deployments, engaging a qualified professional ensures a proper and efficient installation. Improper installation can lead to significant downtime and repair costs.
Conclusion
Understanding the nuances of your 3.3.6 connect patch panel cables—despite the non-standard nomenclature—is fundamental to maintaining a reliable and efficient network. By understanding cable types, implementing proper installation techniques, and following best practices for maintenance and troubleshooting, you can ensure your network performs optimally and supports your organization's needs. Remember, proactive planning, diligent execution, and ongoing maintenance are the cornerstones of a robust and scalable network infrastructure. Addressing these aspects effectively translates to minimized downtime, maximized productivity, and long-term cost savings. This comprehensive guide provides a strong foundation for effectively managing and maintaining your crucial network infrastructure components.
Latest Posts
Latest Posts
-
Shooting Guns Its Rather Fun Actually
Mar 28, 2025
-
Which Stone Age Artifacts Possibly Served As Fertility Fetishes
Mar 28, 2025
-
Pal Cadaver Axial Skeleton Vertebral Column Lab Practical Question 4
Mar 28, 2025
-
Spain Is Linguistically And Culturally Homogenous
Mar 28, 2025
-
Amoeba Sisters Monohybrid Crosses Answer Key
Mar 28, 2025
Related Post
Thank you for visiting our website which covers about 3.3.6 Connect Patch Panel Cables 1 . We hope the information provided has been useful to you. Feel free to contact us if you have any questions or need further assistance. See you next time and don't miss to bookmark.
