To Check Charging Voltage Connect A Digital Multimeter
Onlines
Mar 24, 2025 · 7 min read
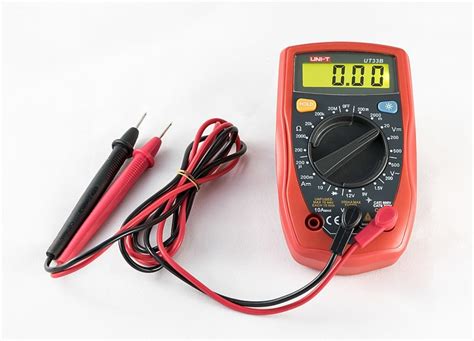
Table of Contents
Checking Charging Voltage with a Digital Multimeter: A Comprehensive Guide
Knowing how to check charging voltage with a digital multimeter is a crucial skill for anyone working with electronics, maintaining vehicles, or simply troubleshooting power issues. This comprehensive guide will walk you through the process step-by-step, explaining the importance of accurate voltage readings, safety precautions, and various applications across different systems.
Understanding Charging Voltage
Before we dive into the practical aspects of using a multimeter, it's important to understand what charging voltage represents. Charging voltage refers to the electrical potential difference provided by a charging source, such as a battery charger, alternator, or power supply, to replenish the energy stored in a battery or capacitor. The correct charging voltage is critical for optimal battery health and the longevity of electronic devices. An insufficient voltage may lead to undercharging, while excessive voltage can cause damage or even explosion.
Importance of Accurate Voltage Readings
Accurate voltage readings are paramount for several reasons:
- Preventing Battery Damage: Incorrect charging voltage can lead to premature battery failure, reduced lifespan, and even irreversible damage.
- Ensuring Proper Device Function: Electronic devices require specific voltage levels to operate correctly. Incorrect voltage can lead to malfunctions, data loss, or complete system failure.
- Identifying Faulty Components: Measuring charging voltage helps pinpoint problems within the charging system itself, such as a malfunctioning alternator or a faulty power supply.
- Maintaining Safety: Accurate measurements are essential to ensure the safety of both the equipment and the user. Incorrect readings could lead to dangerous situations involving electrical shock or equipment damage.
Safety Precautions: Prioritizing Safety When Using a Multimeter
Working with electricity always involves inherent risks. Adhering to strict safety protocols is non-negotiable when using a multimeter to check charging voltage. These precautions are essential to prevent injury and damage:
- Disconnect Power Source: Before connecting the multimeter, always disconnect the power source to the circuit you're testing. This prevents accidental electric shocks and protects both you and the equipment.
- Use Insulated Tools: Utilize insulated tools and work gloves to minimize the risk of electrical shock.
- Wear Safety Glasses: Protecting your eyes is crucial in case of accidental sparks or component failure.
- Understand Your Multimeter: Familiarize yourself with the functions and settings of your multimeter before beginning any measurements.
- Check for Damaged Wires: Inspect wires for fraying or damage before making any connections. Replace any damaged wires immediately.
- Work in a Well-Lit Area: A well-lit workspace improves visibility and reduces the risk of errors.
- Never touch exposed terminals: Always ensure the probes are securely connected to the appropriate terminals.
Using a Digital Multimeter to Check Charging Voltage: A Step-by-Step Guide
Now, let's delve into the practical steps of using a digital multimeter to check charging voltage. This guide will cover the general process; specific procedures may vary slightly depending on the system being tested.
Step 1: Selecting the Appropriate Voltage Range
Your digital multimeter should have multiple voltage ranges, typically expressed in volts (V). Start by selecting a range that exceeds the expected charging voltage. For instance, if you expect a voltage of around 12V (common for car batteries), select a range like 20V or higher. Choosing a range too low can damage your multimeter.
Step 2: Connecting the Multimeter Probes
Most digital multimeters have two probes: a red probe (positive) and a black probe (negative). Connect the red probe to the positive (+) terminal of the charging source and the black probe to the negative (-) terminal. Ensure the probes are firmly connected to avoid inaccurate readings.
Step 3: Reading the Voltage
Once the probes are connected, your multimeter should display the charging voltage. Observe the reading carefully. The displayed voltage should be within the acceptable range for the system you are testing. For example, a car battery's charging voltage should be around 13.5-14.5V while the engine is running.
Step 4: Interpreting the Reading
Compare the measured voltage with the expected voltage for your specific system. If the voltage is significantly lower or higher than the expected range, it could indicate a problem with the charging system. A lower voltage might signify a weak battery or a malfunctioning alternator, while a higher voltage might suggest a faulty regulator.
Step 5: Troubleshooting Based on Readings
Based on the voltage reading, you can begin troubleshooting potential issues. This may involve checking the battery for sulfation, testing the alternator output, or examining the charging circuitry for faults.
Checking Charging Voltage in Different Systems
The process of checking charging voltage is similar across various systems, but the expected voltage range and the specific points of measurement will differ. Let's look at some common examples:
Checking a Car Battery's Charging Voltage
The process for checking a car battery's charging voltage involves:
- Start the engine: Ensure the car's engine is running.
- Connect the multimeter: Connect the multimeter probes to the battery terminals. The red probe goes to the positive (+) terminal, and the black probe goes to the negative (-) terminal.
- Observe the reading: The reading should be between 13.5V and 14.5V. Readings outside this range indicate potential issues with the alternator or charging system.
Checking the Charging Voltage of a Motorcycle Battery
The procedure for motorcycles is very similar to cars:
- Start the engine: Run the motorcycle's engine.
- Connect the multimeter: Connect the multimeter probes to the battery terminals, ensuring proper polarity.
- Observe the reading: The reading should fall within a similar range to car batteries (13.5V - 14.5V).
Checking the Charging Voltage of a Power Supply
Power supplies used for electronics have different voltage requirements, and these need to be checked when the system is under load:
- Connect the device: Connect the electronic device to the power supply.
- Connect the multimeter: Connect the multimeter in parallel with the output of the power supply (across the positive and negative terminals).
- Observe the reading: The reading should match the power supply's rated output voltage. Fluctuations might indicate a faulty power supply or damaged device.
Checking the Charging Voltage of a Solar Panel System
Checking solar panel systems requires more specialized knowledge and safety precautions, but the basic principle remains the same:
- Turn off the inverter: Ensure the inverter is turned off before making any measurements.
- Connect the multimeter: Connect the multimeter probes to the solar panel's output terminals. Use appropriate voltage range.
- Observe the reading: The voltage will depend on the solar panel's specifications and the sunlight conditions.
Troubleshooting Common Charging Voltage Issues
Low or high charging voltages often point to problems within the system. Here are some common causes and troubleshooting steps:
- Low Charging Voltage: This could be due to a weak battery, a faulty alternator (in vehicles), or a problem with the charging circuit. Check the battery's state of charge, test the alternator output, and inspect the wiring for any damage.
- High Charging Voltage: Excessive voltage often indicates a problem with the voltage regulator (in vehicles or power supplies). A faulty regulator can overcharge the battery and damage electronic components. Replace the regulator if necessary.
- Intermittent Charging Voltage: Fluctuations in charging voltage could be caused by loose connections, corroded terminals, or intermittent faults within the charging circuit. Check all connections and clean any corroded terminals.
Choosing the Right Digital Multimeter
Selecting the appropriate multimeter depends on your needs and the types of measurements you'll be performing. Consider the following features:
- Accuracy: Look for multimeters with high accuracy ratings.
- Voltage Range: Ensure the multimeter can measure the voltage ranges relevant to your applications.
- Durability: A durable multimeter can withstand the rigors of regular use.
- Features: Consider additional features like data logging or auto-ranging capabilities, depending on your requirements.
Conclusion
Checking charging voltage with a digital multimeter is an essential skill for maintaining various electronic devices and systems. By following the safety precautions, understanding the procedures, and interpreting the readings accurately, you can ensure optimal performance and prevent potential damage. Remember to always prioritize safety and consult appropriate resources for specific systems and equipment. With proper knowledge and careful execution, you can confidently utilize your digital multimeter for accurate voltage readings and effective troubleshooting.
Latest Posts
Latest Posts
-
Things Fall Apart Chapter 7 Summary
Mar 25, 2025
-
Catch Me If You Can Movie Questions Answers
Mar 25, 2025
-
Intentionally Doing Things That Negatively Affect
Mar 25, 2025
-
Anaphylaxis Is Most Accurately Defined As An
Mar 25, 2025
-
Symbols In Dr Jekyll And Mr Hyde
Mar 25, 2025
Related Post
Thank you for visiting our website which covers about To Check Charging Voltage Connect A Digital Multimeter . We hope the information provided has been useful to you. Feel free to contact us if you have any questions or need further assistance. See you next time and don't miss to bookmark.
